Edit your RAW photos
Written the 1st of March 2026
The problem
For years I wanted to shoot in RAW and be able to edit the photos, but an easy to use workflow was lacking.
Yes, I shoot mainly using my phone’s camera and let me tell you, that’s more than enough for my needs. Present phone sensors capture light much better than phones from many years ago, we have come a long way thanks to advancements in technology!
People often buy DSLR cameras because they hear they can “shoot better photos”, but that’s an oversimplification and most of the time not really what you wanted or really needed.
Sure, DSLRs can produce different DOF and other effects that small sized sensors like the ones present in phones simply can’t because of physical limitations… but I think phone cameras are very very good if someone properly handles the process of the formation of the photo 😉.
I’ve been using Blender for years, and the implementations of first Filmic, and recently AgX by
Troy
led me to think whether the same transform could also be used for my photos.
One day someone on Mastodon posted a link to an app for editing photos using AgX, 🤔 which got me interested in trying. This is how I discovered what would become my favourite photo editing app, Saulala!
Saulala
Saulala, is an app designed by a photographer for photographers.
Petrikas
is the main developer, he made a version for Android in the past, but recently he released a web app version of it.
This web app allows you to edit RAW photos using AgX, a view transform designed to give a “film look” to images. While the JPG output of popular camera apps is “ok” for the majority of people, it often skews colors up, and we want to avoid that.
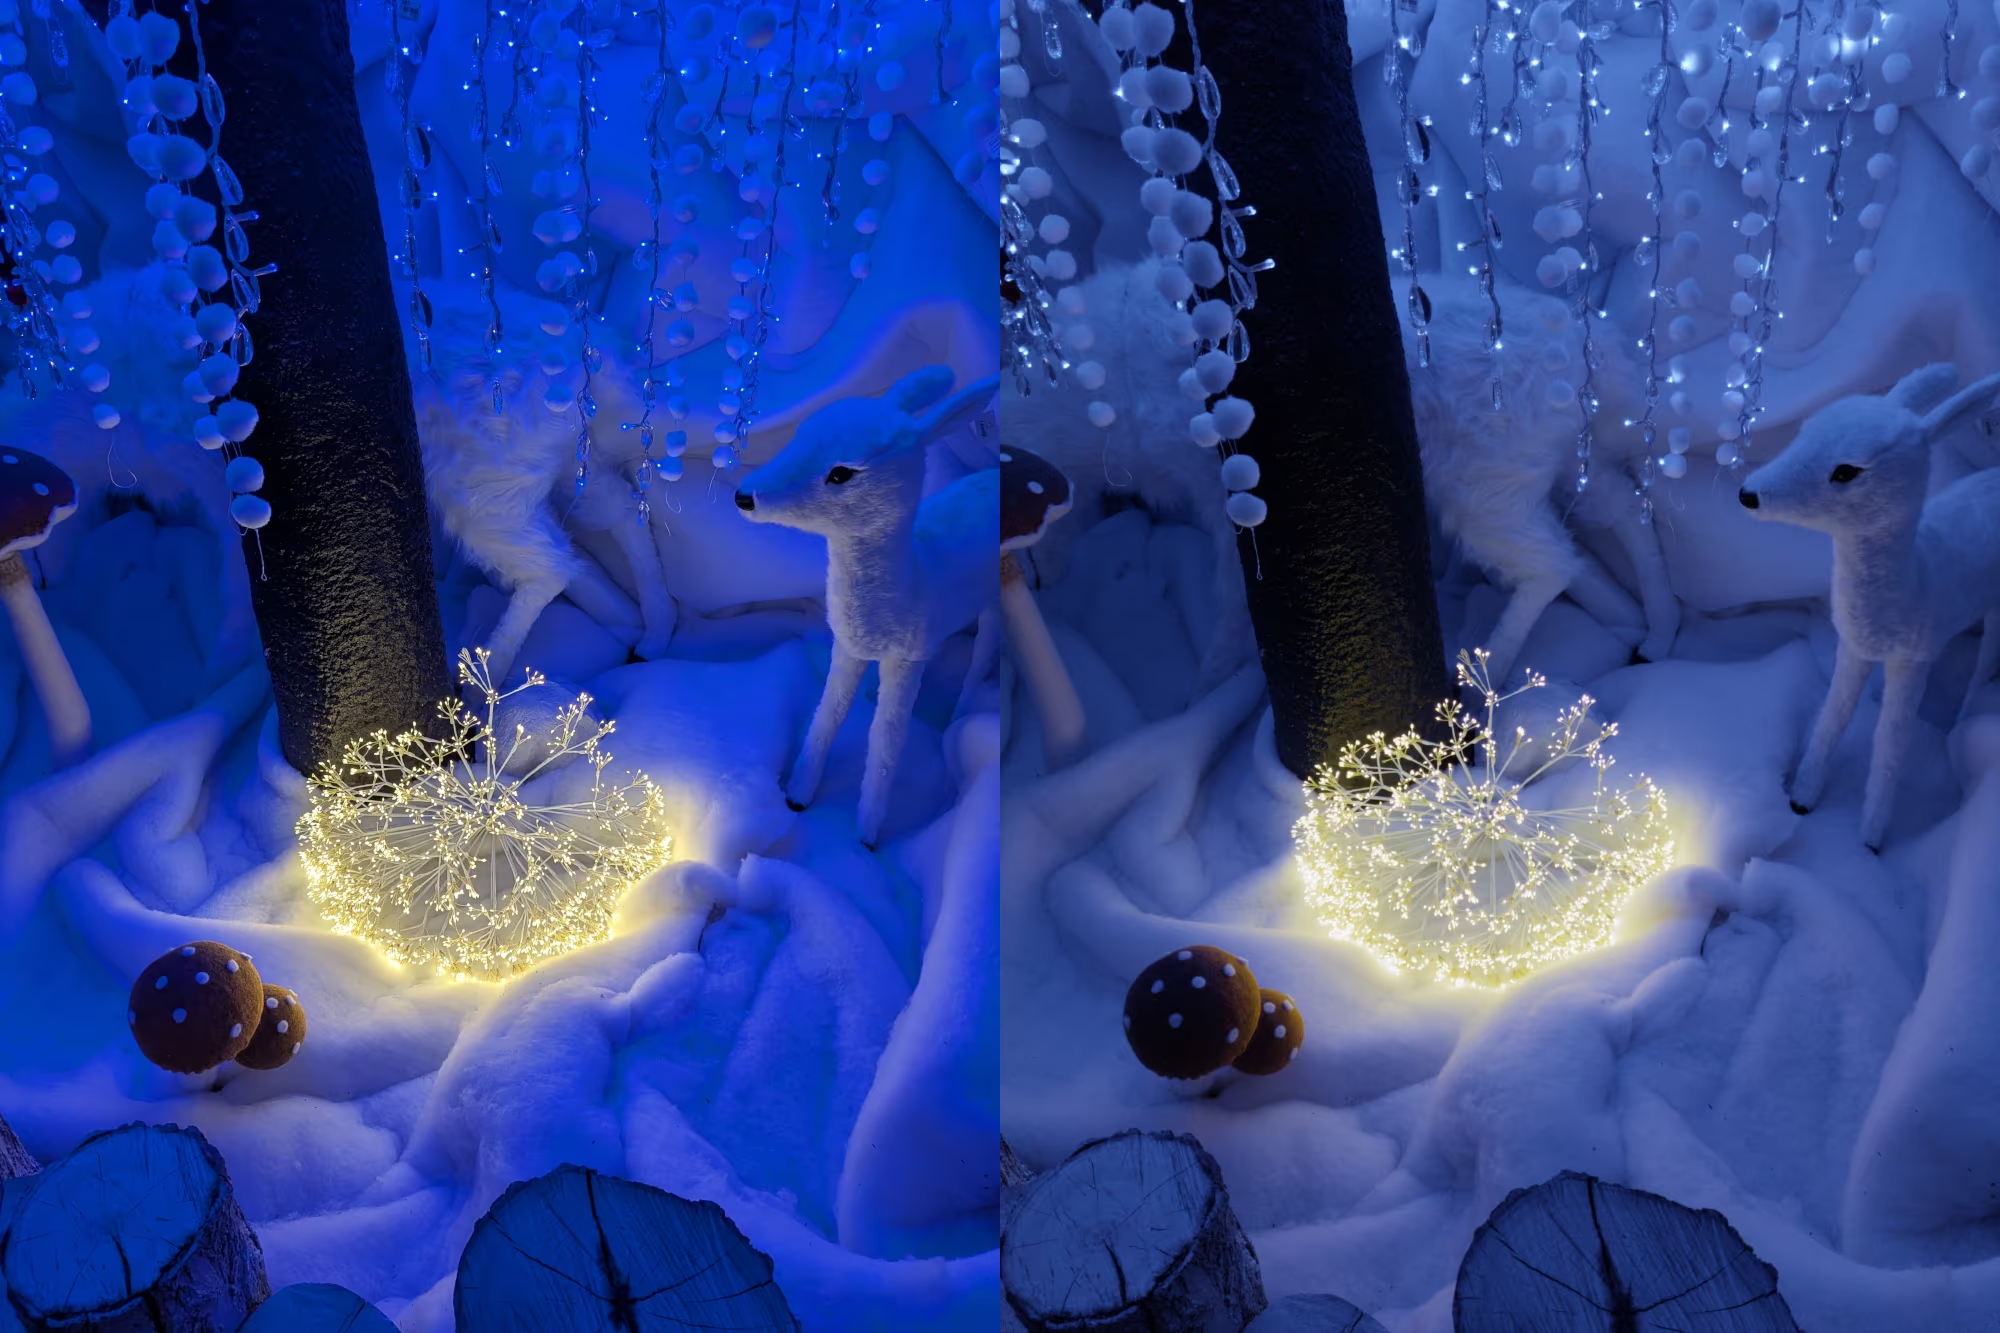
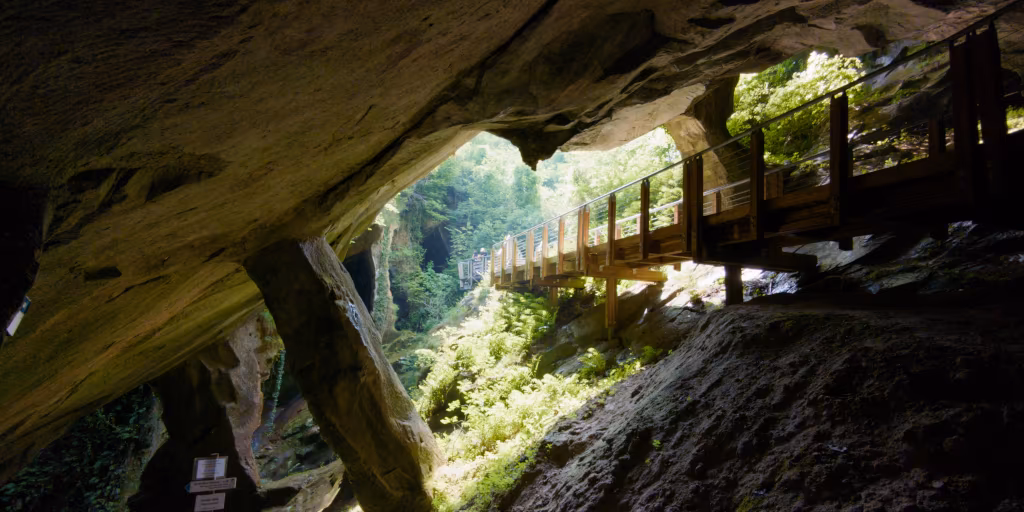
Here’s an example: the left image is the JPG output of the Google Camera app, the right image is the RAW photo edited using Saulala. The difference is huge!! 😊
You may say the left one looks cool because it’s more saturated and “artistic”, but that’s not the point (you can saturate the right one even more if you want), the point is that the right one looks more “natural” because light is being transformed in a logarithmic way rather than being clipped.
Notice how blue and yellow are being clipped on the left image…
If you want to tweak some colors or even the exposure then you cannot rely on just the JPG as all the useful information is lost, you need the RAW data of the image captured by the sensor.
Edit your photos
Capture a RAW photo with your phone’s camera app (to do so you may have to enable RAW capturing in the settings of the app), open Saulala in your browser (could be on mobile or even from desktop), tap on “Import file” and select your RAW photo.
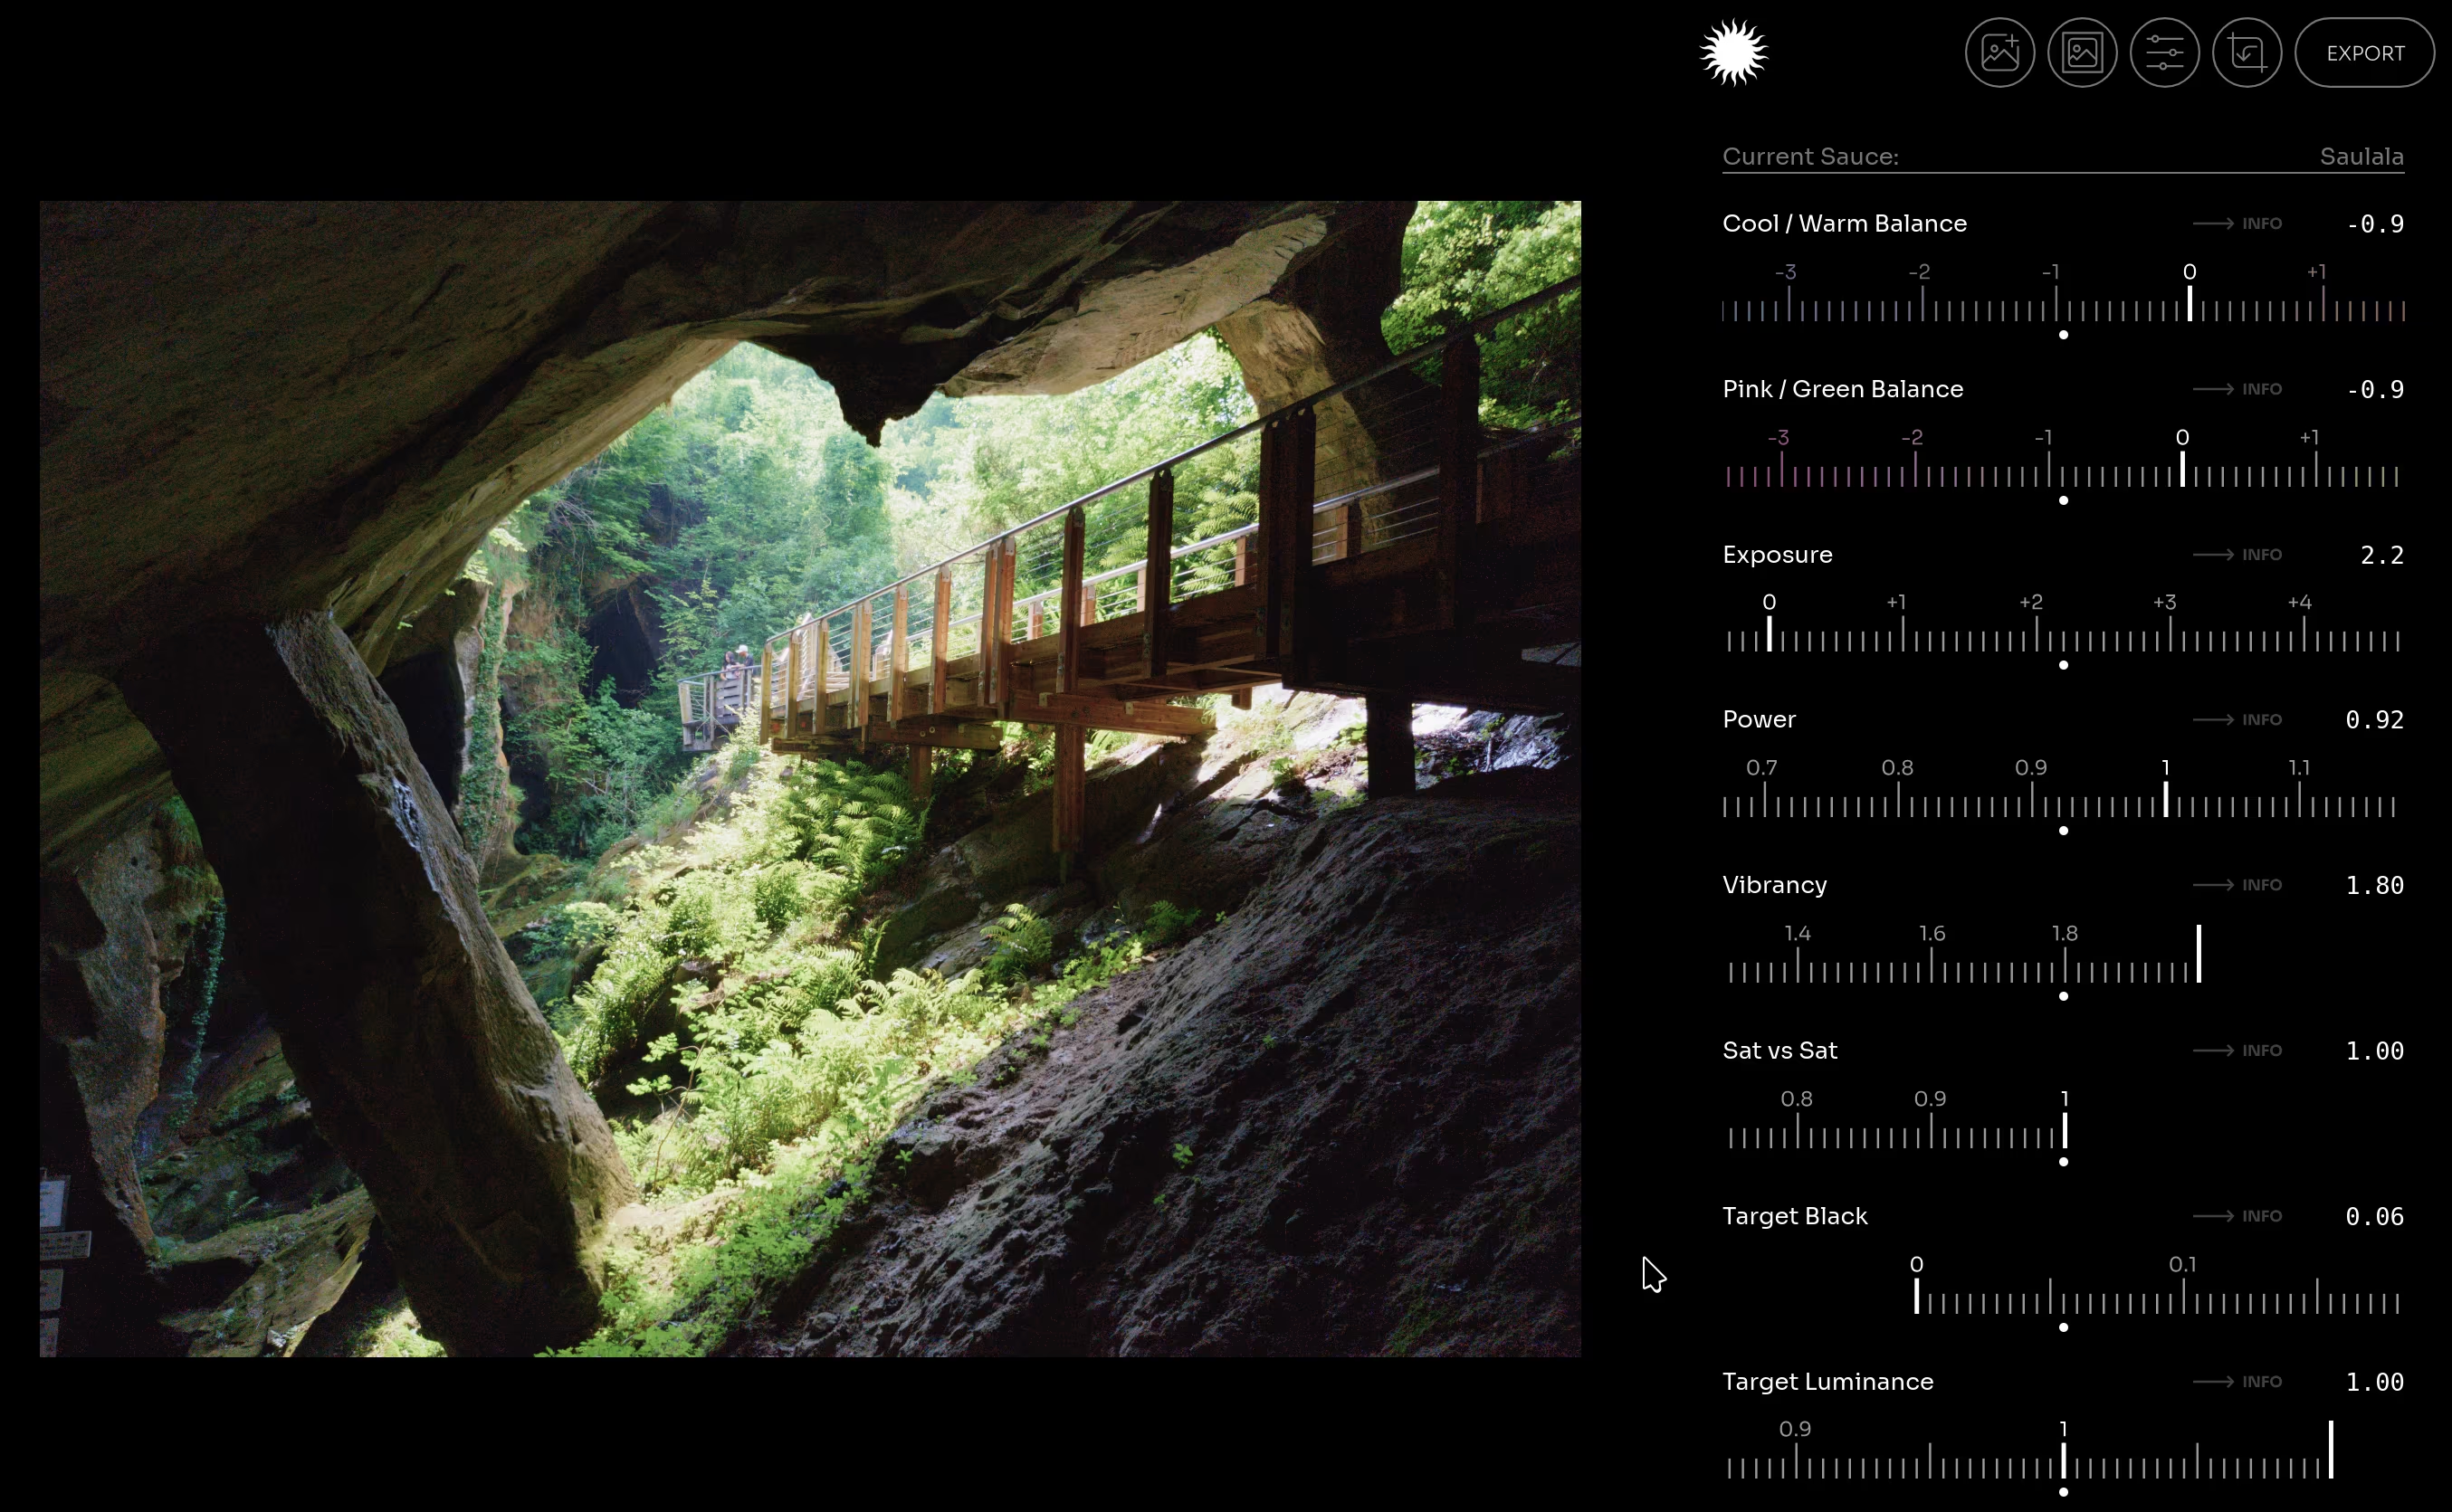
That’s it! 😊 Now you’ll be able to edit the Exposure, Vibrancy (saturation), Temperature, Power (contrast) along many other options. Petrikas even implemented multiple “sauces” of AgX, I prefer to use the “Saulala” sauce.
Once finished click “Export” and you’ll be able to save a final JPG image. It’s that easy!
I cannot thank Petrikas enough for giving this tool to everyone, for free!
It’s a so useful and essential piece of software that it became my favourite way of editing my phone photos.